Meteobridge VM on KVM
From meteobridge
First step is that you download the KVM/QEMU compatible disk image here. File is in "gzip" format and needs to be decompressed first. Result is a rawdisk image file of about 16GB in size named "meteobridge-mbx86-v1.0-16G.img". Next steps are related to build the Meteobridge VM within KVM based on the downloaded disk image.
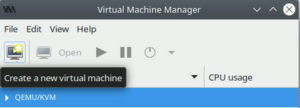
- Access the KVM Virtual Machine Manager and define a new VM.
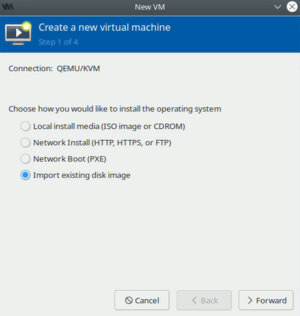
- Select mode "Import existing disk image".
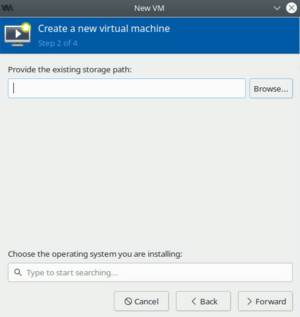
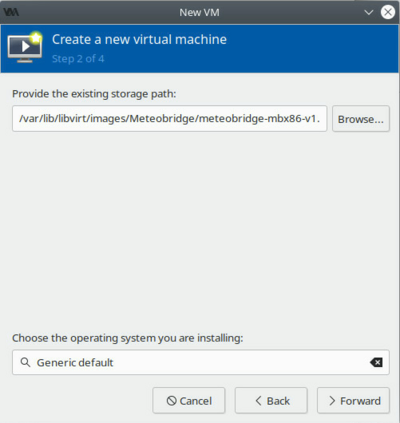
- To provide an existing storage path, press the "Browse..." button.
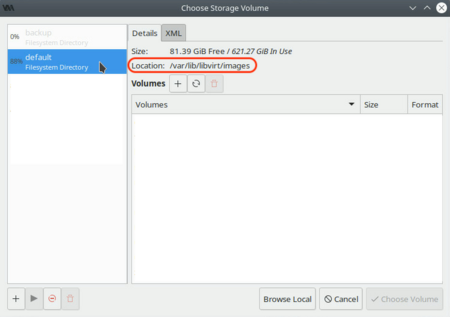
- Select a storage pool from the left. "default" might be a good choice unless you have not defined a specific one for your VMs. Having selected the VM pool your will see a list of already defined VMs. You also see the physical location of the VM pool. Here it is "/var/lib/libvirt/images".
- No go to your command shell and generate a new folder for Meteobridge in your VM pool. On linux doing so looks like this (you may need to be root to do so, therefore the preceding "sudo"):
sudo mkdir /var/lib/libvirt/images/Meteobridge
- Next the downloaded and decompressed Meteobridge disk image file needs to be copied into this folder.
sudo cp /path-to-where-you-downloaded-the-file/meteobridge-mbx86-v1.0.img /var/lib/libvirt/images/Meteobridge/
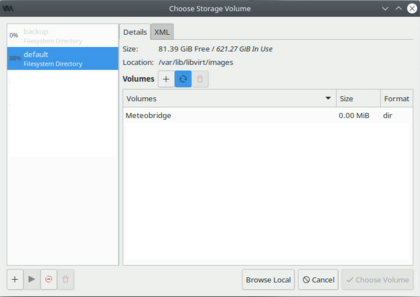
- To make the newly created directory available press the reload circles besides the "Volumes" label. In the example "Meteobridge" now appears as a new volume.
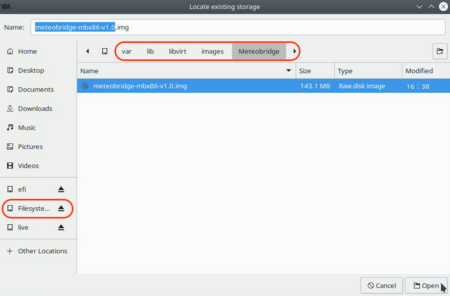
- Press "Browse Local" button and navigate with help of the "Filesystem" entry down to the Meteobridge VM image file. For orientation you see the stepping down into folders on the top line. When you finally reach the image file, select it and press "Open".
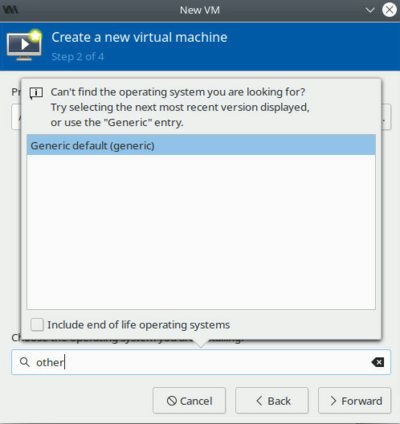
- Being back to the calling menu, please insert "other" into the search bar. A dialog presenting item "Generic default (generic)" will pop up. Double click the entry.
- Now you are back to the calling menu with the information filled in as in the example below. Press "Forward".
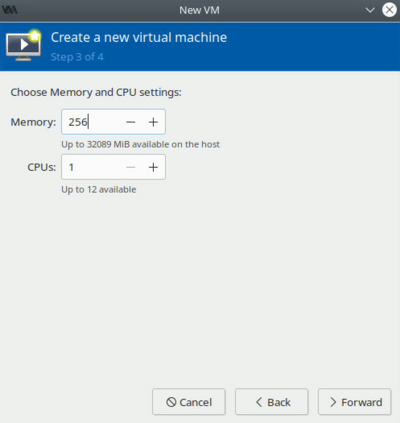
- KVM now needs some additional information for setting up the VM. Select 256 MB for RAM and 1 processor (this will be perfectly fine for Meteobridge). Then press "Forward".
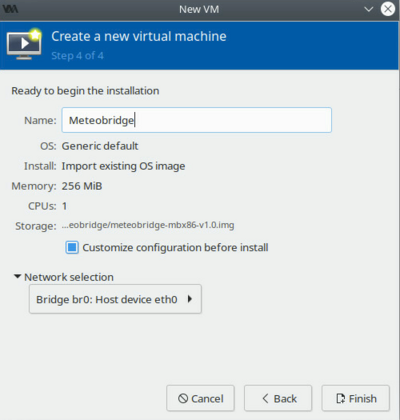
- Last step is to give the new VM a name, please check that "Bridge" is selected as network option (should be default) and "Customize configuration before install" to do some additionel settings later on. Then press "Finish".
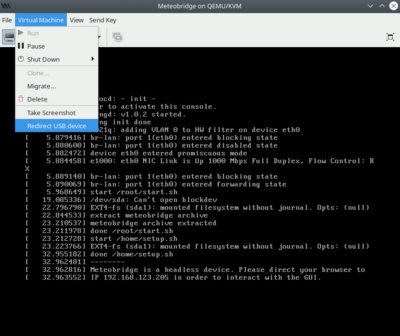
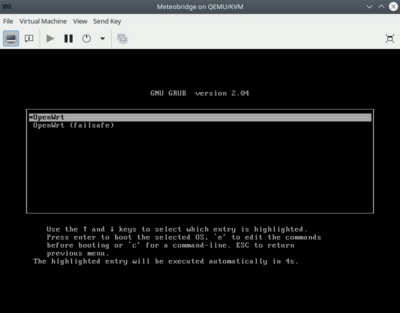
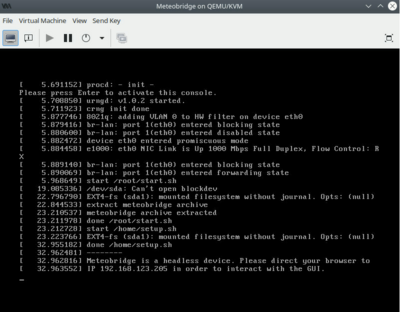
- It will only take a few seconds to build and start the VM. You will see the VM starting into the GRUB boot loader and then booting automatically. The booting is done when Meteobridge VM does tell you the IP where to reach the Meteobridge GUI in your LAN.
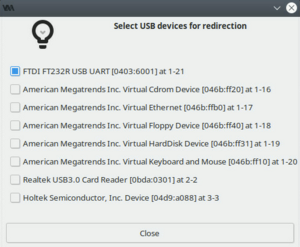
- When you have a weather station connected via USB then you need to tell the host that this USB connection should be handed over to the Meteobridge VM. THis is done via the "Virtual Machine - Redirect USB device" option in the menu. In the example a Meteostick which makes use of a FTDI converter is used. Therefore, the FTDI entry is selected.