Difference between revisions of ":Preparing Hardware/33/en"
(Importing a new version from external source) |
(Importing a new version from external source) |
||
| Line 1: | Line 1: | ||
| − | ==Flashing Meteobridge Firmware to TL-MR3040 ( | + | ==Flashing Meteobridge Firmware to TL-MR3040 (version 2.x)== |
This firmware image is just valid for the 2.x version of the MR3040. You have a 2.x version of this router if it has the 3G/WSP/AP switch at the side. Please consult the TP-Link manual to understand how to get access with your browser to its web interface. What the manual will tell you is basically that you have to connect your PC/Laptop via Ethernet cable, and log in to the router's web interface (IP is 192.168.0.1, login name is "admin", password: "admin"). | This firmware image is just valid for the 2.x version of the MR3040. You have a 2.x version of this router if it has the 3G/WSP/AP switch at the side. Please consult the TP-Link manual to understand how to get access with your browser to its web interface. What the manual will tell you is basically that you have to connect your PC/Laptop via Ethernet cable, and log in to the router's web interface (IP is 192.168.0.1, login name is "admin", password: "admin"). | ||
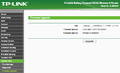
When you have access to web interface of TL-MR3040, overwrite factory firmware like a regular firmware update by [http://connect.meteobridge.com/files/meteobridge-tl-mr3040v2-v1.5.bin meteobridge-tl-mr3040v2-v1.5.bin]. Wait until unit restarts. After that it will be a Meteobridge client in standard configuration receiving an IP via DHCP from your router in the LAN. Please note that the TL-MR3040 does not provide slow blinking during boot. So LEDS will mainly stay dark until loading of Meteobridge application stack is indicated by fast blinking. This is just an oddity with the LEDs that does not have an impact on proper operation. | When you have access to web interface of TL-MR3040, overwrite factory firmware like a regular firmware update by [http://connect.meteobridge.com/files/meteobridge-tl-mr3040v2-v1.5.bin meteobridge-tl-mr3040v2-v1.5.bin]. Wait until unit restarts. After that it will be a Meteobridge client in standard configuration receiving an IP via DHCP from your router in the LAN. Please note that the TL-MR3040 does not provide slow blinking during boot. So LEDS will mainly stay dark until loading of Meteobridge application stack is indicated by fast blinking. This is just an oddity with the LEDs that does not have an impact on proper operation. | ||
Latest revision as of 13:53, 28 January 2018
Flashing Meteobridge Firmware to TL-MR3040 (version 2.x)
This firmware image is just valid for the 2.x version of the MR3040. You have a 2.x version of this router if it has the 3G/WSP/AP switch at the side. Please consult the TP-Link manual to understand how to get access with your browser to its web interface. What the manual will tell you is basically that you have to connect your PC/Laptop via Ethernet cable, and log in to the router's web interface (IP is 192.168.0.1, login name is "admin", password: "admin"). When you have access to web interface of TL-MR3040, overwrite factory firmware like a regular firmware update by meteobridge-tl-mr3040v2-v1.5.bin. Wait until unit restarts. After that it will be a Meteobridge client in standard configuration receiving an IP via DHCP from your router in the LAN. Please note that the TL-MR3040 does not provide slow blinking during boot. So LEDS will mainly stay dark until loading of Meteobridge application stack is indicated by fast blinking. This is just an oddity with the LEDs that does not have an impact on proper operation. You can find out on page "System Tools -> Firmware Upgrade" of your router if it is a hardware version 1.x or 2.x.
hardware version 2.x
